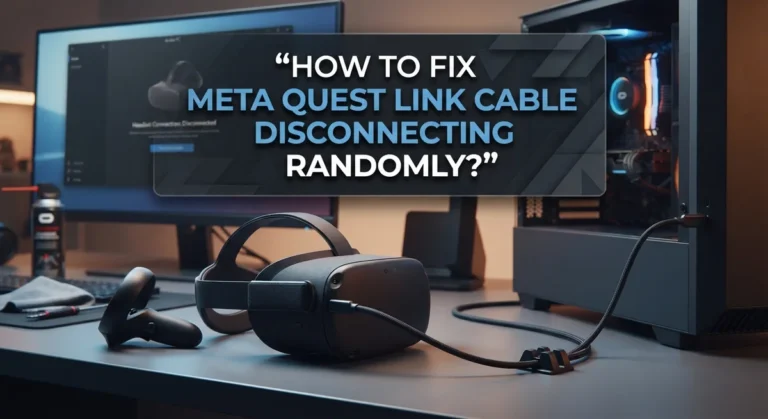
How To Fix Meta Quest Wi-Fi Disconnecting During Multiplayer?
Your Meta Quest keeps dropping Wi-Fi right in the middle of a multiplayer match. Frustrating, right?
This is a common issue reported by both Quest 2 and Quest 3 users. Disconnections can happen every 5 to 30 minutes, ruining your game sessions and breaking your connection to other players.
The good news is that most of these disconnections have fixable causes. Signal interference, router compatibility issues, and outdated software are usually behind the problem.
This guide walks you through every proven fix, step by step. You will learn how to restart your headset properly, perform a hard reboot, adjust your Wi-Fi channel band, and more.
By the end of this article, you will know exactly what to try and in what order. Whether your headset disconnects every few minutes or only during intense gameplay, there is a solution here for you.
In a Nutshell
- Meta Quest Wi-Fi disconnecting during multiplayer is usually caused by router compatibility issues, signal interference, or outdated software.
- The first thing to try is a simple restart of both your headset and your Wi-Fi router.
- If a basic restart does not work, perform a hard reboot by holding the power button and volume down button together.
- Changing your Wi-Fi channel band is one of the most overlooked fixes and can stop disconnections almost immediately.
- Updating your game to the latest version is a step many users skip, but it matters more than most people think.
- If nothing else works, a factory reset of your headset is a proven last resort that resolves most persistent connection problems.
Why Does Your Meta Quest Keep Disconnecting During Multiplayer?
Your Meta Quest disconnects during multiplayer for specific reasons. Understanding these causes helps you fix the problem faster.
Router and headset compatibility issues are the most common culprits. Your router may use a Wi-Fi standard that your Meta Quest doesn’t handle well during intense multiplayer sessions. When multiple players connect simultaneously, your headset struggles to maintain a stable connection. This typically happens with older routers or routers set to specific frequency bands.
Signal interference also plays a major role. Your home likely has many devices competing for the same Wi-Fi frequency. Microwaves, cordless phones, Bluetooth speakers, and even baby monitors can disrupt your connection. The interference becomes worse when you’re farther from your router.
Network congestion causes disconnections too. If other devices are downloading large files or streaming video while you play, your headset loses priority. Your router simply cannot allocate enough bandwidth to keep your multiplayer session stable.
Outdated game software is another reason people overlook. When your game version is old, it may have connection bugs that newer updates fixed. Your headset firmware can also become outdated, causing compatibility problems with your router.
Poor signal strength directly impacts multiplayer stability. If you play in a room far from your router, or if walls block the signal, disconnections happen more frequently. Multiplayer games demand constant data flow, so weak signals cause immediate drops.
Headset software glitches sometimes develop over time. Your Meta Quest stores temporary files and cache that can corrupt. This corruption affects Wi-Fi performance without you realizing it.
These causes work together or separately. The key is identifying which one affects your specific situation so you can apply the right fix.
How To Check Your Wi-Fi Signal and Network Status
Your Wi-Fi signal strength directly affects multiplayer performance on your Meta Quest. A weak signal causes frequent disconnections, lag, and dropped sessions. You need to check your signal quality before trying other fixes.
Start by opening your Meta Quest settings menu. Look for the Wi-Fi or Network section. Your headset displays the current signal strength as bars or a percentage. Most Meta Quest devices show this information clearly in the network settings area.
Strong signals show three to four bars. Weak signals show one to two bars. If you see only one bar, your headset sits too far from your router. Move closer to the router and check if the signal improves.
Next, check your router’s status light. Most routers have a light that indicates internet connection quality. A steady light means good connection. A blinking light suggests data transfer. A red or orange light indicates a problem with your internet service.
Test your internet speed using another device. Open a web browser on your phone or computer. Visit a speed test website and run the test. Your internet should provide at least 10 megabits per second for smooth multiplayer gaming. Slower speeds cause disconnections.
Also check how many devices connect to your Wi-Fi network. Too many devices drain bandwidth and reduce signal strength for your headset. Disconnect devices you are not using.
Look around your play area for interference sources. Microwaves, cordless phones, and baby monitors operate on the same frequency as Wi-Fi. Move these devices away from your router if possible.
After checking signal strength and network status, you will know whether your Wi-Fi setup is the problem. This information guides your next troubleshooting step.
How To Restart and Hard Reboot Your Meta Quest Headset
A simple restart often fixes temporary glitches, but a hard reboot goes deeper. This method clears your headset’s memory and resets its connection processes completely.
Start with a standard restart first. Press and hold the power button on your headset until you see a shutdown menu. Select “Shut Down” and wait 30 seconds. Then press the power button again to turn it back on. This takes about two minutes total.
If disconnections continue during multiplayer, move to a hard reboot. This forces your headset to reset its system without erasing your data or apps.
Here’s how to perform a hard reboot. Locate the power button on the right side of your headset. Find the volume down button below it. Press and hold both buttons simultaneously for about 10 seconds. Your screen will go black and you’ll see a boot menu appear.
You’ll see several options on screen. Select “Restart” from the menu. Your headset will power down completely, then restart fresh. This entire process takes roughly three to four minutes.
Wait for your headset to fully restart before testing. Don’t put it on immediately. Let it sit for 30 seconds after the startup screen appears. Then reconnect to your Wi-Fi network manually through settings.
Launch your multiplayer game and play for at least 10 minutes. Monitor your connection stability during this test period. A hard reboot fixes many connection issues because it clears corrupted cache files and resets network drivers.
If disconnections still happen after a hard reboot, the problem likely involves your router or Wi-Fi network itself rather than your headset.
How To Fix Router Settings and Change Your Wi-Fi Channel Band
Your router settings directly control how your Meta Quest connects to Wi-Fi during multiplayer sessions. Changing your Wi-Fi channel band is one of the most effective fixes for disconnections.
Most routers broadcast on either the 2.4 GHz band or the 5 GHz band. The 2.4 GHz band travels farther but moves slower and faces more interference from other devices like microwaves and baby monitors. The 5 GHz band moves faster but has shorter range.
Start by accessing your router’s admin panel through a web browser on your computer or phone. You’ll typically enter your router’s IP address (usually 192.168.1.1 or 192.168.0.1) into the address bar. Log in using your router’s username and password, which you can find on a sticker attached to the router itself.
Look for the wireless settings or Wi-Fi settings section. You’ll see options to select your Wi-Fi channel. If you’re currently on 2.4 GHz, try switching to 5 GHz. If you’re on 5 GHz, try switching to 2.4 GHz instead.
Save your changes and wait for your router to restart. This process usually takes one to two minutes.
Now reconnect your Meta Quest to the new Wi-Fi band. Go to your headset’s settings, find the Wi-Fi menu, and select your network again. You may need to enter your Wi-Fi password.
Test your multiplayer connection by launching a game and playing for at least 15 minutes. Watch for disconnections during active gameplay. If problems continue, try the opposite band or contact your router manufacturer for advanced channel recommendations specific to your area.
How To Update Your Game Software to Prevent Disconnections
Keeping your game software updated is one of the most effective ways to prevent Wi-Fi disconnections during multiplayer sessions. Developers release updates specifically to fix connectivity bugs and improve network stability on your Meta Quest headset.
Check for pending game updates first. Open your Meta Quest library and look for any games showing an update notification. These updates often contain fixes for multiplayer connection issues. Install all available updates before launching your game.
Next, enable automatic updates for your games. Go to your Meta Quest settings menu and find the applications section. Look for an option to automatically download and install game updates. This ensures you always have the latest version without manual checking.
Update your headset software separately from game updates. Your Meta Quest operating system has its own update schedule. Navigate to your settings menu and select “About.” Look for a system update option. If an update is available, connect to Wi-Fi and install it immediately. System updates often include network performance improvements.
After updating both your game and headset software, restart your headset completely. This allows all new changes to take effect properly. Press and hold the power button until the shutdown menu appears.
Test your multiplayer connection right after updating. Launch your game and play for at least 15 minutes to confirm the disconnection issue has resolved. Pay attention to how long your session lasts without dropping connection.
If disconnections persist after updating everything, the problem likely stems from your Wi-Fi setup rather than outdated software. Move forward with testing different Wi-Fi networks or adjusting your router settings to continue troubleshooting.
How To Test a Different Wi-Fi Network to Isolate the Problem
Testing a different Wi-Fi network helps you figure out if the problem is with your current network or your headset itself. This step is important because it narrows down the cause of your disconnections.
Start by finding an alternative Wi-Fi network you can use. This could be a friend’s home network, a family member’s Wi-Fi, or even a mobile hotspot from another device. The key is using a completely different router and internet connection than your current setup.
Connect your Meta Quest to this new network. Go to your headset settings, find the Wi-Fi section, and select the alternative network. Enter the password if needed and wait for the connection to establish fully.
Once connected, launch your multiplayer game and play for at least 15 to 20 minutes. Pay close attention to whether disconnections happen like they did before. If your headset stays connected smoothly on this new network, your original router or Wi-Fi setup is likely the problem.
If disconnections still occur on the different network, the issue lives inside your headset itself. This means you may need to try a factory reset or contact support for further help.
Document what you observe during testing. Write down how long you played without disconnecting and any patterns you notice. This information helps you explain the problem clearly if you need technical support later.
Testing different networks takes just 20 minutes but gives you clear answers. You’ll know exactly whether to fix your router settings or focus on your headset troubleshooting instead. This simple test saves you time and frustration by eliminating guesswork.
How To Factory Reset Your Meta Quest as a Last Resort
A factory reset wipes your Meta Quest completely and returns it to its original state. This step works best after you’ve tried all other solutions. It removes software glitches that cause Wi-Fi drops during multiplayer.
Before you factory reset, back up any important data. Your game progress saved to the cloud stays safe, but local files disappear. Write down your Wi-Fi password so you can reconnect afterward.
To start the factory reset, put on your headset. Go to Settings on your home menu. Select System, then look for Reset Options. You’ll see two choices: Reset Headset and Factory Reset. Choose Factory Reset for a complete wipe.
The headset will ask you to confirm. Press the button to proceed. Your Meta Quest will restart and begin erasing all data. This process takes 5 to 10 minutes. The screen goes black during this time, which is normal. Don’t remove the headset or press any buttons while it resets.
Once the reset finishes, your headset restarts like new. You’ll see the setup screen again. Go through the initial setup process just like when you first got your headset. Connect to Wi-Fi during setup.
After setup completes, reconnect your Meta Quest account. Download your games again from your library. Then test your multiplayer connection by playing for at least 20 minutes.
If disconnections still happen after a factory reset, the problem likely exists outside your headset. Contact the support team for additional help. A factory reset solves most Wi-Fi issues, but some problems need professional assistance.
Common Mistakes to Avoid When Troubleshooting Meta Quest Wi-Fi Issues
Many people make simple mistakes when trying to fix Wi-Fi disconnection problems. These errors often waste time and prevent you from finding the real solution.
The biggest mistake is skipping the hard reboot step. Most users restart their headset normally, but this doesn’t fully clear the system. A hard reboot is different. You hold the power button and volume down button together until the headset powers off completely. This clears temporary files that cause connection issues. Skipping this step means you’re missing a crucial fix.
Another common error is ignoring Wi-Fi channel band settings. Your router broadcasts on different channels. Sometimes your headset struggles with one channel but works fine on another. Many people never try changing this setting. They assume their Wi-Fi is fine without testing different options.
People also fail to update their game software before troubleshooting. An outdated game can cause disconnections even if your Wi-Fi is perfect. Always check for pending updates first. This simple step solves problems for many users.
Not testing a different Wi-Fi network is another frequent mistake. Your current network might have hidden problems you can’t see. Testing a friend’s Wi-Fi or a mobile hotspot tells you if the issue is your network or your headset. This information is critical for finding the real cause.
Finally, some users rush to factory reset without trying other solutions first. A factory reset should be your last option, not your first. You lose all your settings and data when you reset. Try the simpler fixes first.
Avoid these mistakes and you’ll troubleshoot faster and more effectively.
Final Thoughts
Wi-Fi disconnections during multiplayer on Meta Quest can feel frustrating, but most cases have a fix. The good news is that almost every disconnection issue has a clear cause and a practical solution.
Start with the simplest steps first. Restart your headset and router before trying anything more advanced. These basic steps fix more problems than most people expect.
If simple restarts do not work, move to a hard reboot. Hold the power button and volume down button together to force a full restart. This clears deeper software issues that a normal restart misses.
Changing your Wi-Fi channel band is one of the most overlooked fixes. Switching from 2.4GHz to 5GHz, or the other way around, can eliminate signal interference instantly.
Always keep your game software updated. Outdated game files cause connection errors that look like Wi-Fi problems but are actually software bugs.
Testing a different Wi-Fi network helps you understand whether the issue is with your headset or your home network. This single step saves a lot of time during troubleshooting.
A factory reset is your final option when nothing else works. It clears everything and gives your headset a completely fresh start.
Follow the troubleshooting steps in order. Skipping steps or jumping straight to a factory reset wastes time and can leave the real problem unsolved.
Patience and a step-by-step approach are your best tools here. Most Meta Quest Wi-Fi disconnection problems during multiplayer are fixable without any special equipment or technical knowledge.
Stick to the process, and your multiplayer sessions will stay stable and connected.
Frequently Asked Questions
Why does my Meta Quest disconnect every 5 minutes during multiplayer?
This usually happens because of router and headset compatibility issues or signal interference in your home. Your Wi-Fi channel might be overcrowded with other devices. Try switching between 2.4GHz and 5GHz bands to see which works better.
Sometimes your headset sits too far from the router. Move closer and test your connection. If disconnections stop nearby, distance is your problem.
Can a factory reset actually fix Wi-Fi disconnections?
Yes, a factory reset solves many connection problems. Your headset accumulates corrupted files over time that interfere with Wi-Fi stability.
A factory reset wipes everything and returns your headset to its original state. This removes problematic files that cause frequent drops.
Should I try a different Wi-Fi network to troubleshoot?
Absolutely. Connecting to a different network tells you if the problem is your headset or your home network.
If disconnections stop on another network, your home router needs attention. Check your router settings or move it to a better location. If disconnections continue on any network, your headset hardware likely needs repair.
What’s the fastest way to fix this issue?
Start with a hard reboot first. Hold the power button and volume down button together for 30 seconds. This fixes most temporary glitches without losing your data.
If that fails, switch your Wi-Fi channel band next. This takes two minutes and solves many cases. Only try a factory reset after these simpler steps don’t work.

Hi, I’m Suzy — the voice behind RapidGenLab. I’m a tech enthusiast who loves breaking down complex products into simple, honest reviews and comparisons. Got a question? Feel free to reach out!