How To Fix Meta Quest Pro Controller Drift In VRChat?
Your avatar keeps walking into walls. Your camera spins on its own. Sound familiar?
Controller drift is one of the most frustrating issues Meta Quest Pro users face in VR Chat. It happens when your joystick sends movement signals without you touching it. The result? A VR experience that feels completely out of your control.
The good news is that this problem is fixable. You do not need to be a tech expert to solve it.
This guide walks you through everything you need to know about fixing Meta Quest Pro controller drift. You will learn how to adjust your deadzone settings directly from your headset. You will also learn how to clean the joystick contacts if the software fix does not work.
In a Nutshell
- Controller drift happens when your joystick sends movement signals without you touching it. This is a hardware and software issue that affects many Meta Quest Pro users in VR Chat.
- You can start with software fixes first. Adjusting the deadzone and thumbstick range settings in your headset menu often solves mild drift without any tools.
- Cleaning the joystick contacts with electrical contact cleaner or isopropyl alcohol is the next step. This removes dirt and residue that cause false inputs.
- If software fixes do not work, physical disassembly may be needed. You will use a Phillips or T-6 Torx screwdriver and a plastic wedge tool to access the joystick mechanism safely.
- Recalibrating your controller after cleaning is a critical step. Skipping this is one of the most common mistakes people make.
- Regular maintenance and proper storage can prevent drift from coming back. Avoiding excessive joystick pressure also helps extend the life of your controllers.
What Is Controller Drift and Why Does It Happen on Meta Quest Pro?
Controller drift is a hardware problem where your joystick registers movement even when you are not touching it. Your character walks forward, turns sideways, or moves in unwanted directions without any input from you. This creates chaos in VR Chat and makes gameplay nearly impossible.
The joystick mechanism inside your Meta Quest Pro controller contains small metal contacts. These contacts wear down over time from regular use. Dust, debris, and moisture can accumulate on these contacts and cause electrical connection problems. When the connection becomes unstable, the controller sends false movement signals to your headset.
Why does this happen? The joystick is one of the most used parts of your controller. Every time you move it, the internal components experience friction and wear. After months of regular use, the contacts degrade naturally. Environmental factors like humidity and dust speed up this degradation process.
Controller drift is not a sign of a defective device. It happens to most VR users eventually. The good news is that the problem stems from a predictable mechanical issue, not a random malfunction.
Where does the problem start? Drift typically begins with minor twitches. You might notice your avatar drifts slightly in one direction. Over time, the problem gets worse. Eventually, your controller becomes unusable in VR Chat.
Understanding what causes drift helps you fix it effectively. The issue lives inside the joystick assembly itself. You can address it through software adjustments, cleaning, or physical repair. Most users find success with one of these three approaches. Starting with the simplest solution first saves you time and effort.
How Controller Drift Affects Your VRChat Experience
Controller drift creates real problems when you are playing VR Chat. Your avatar moves without your input, making social interactions awkward and gameplay unpredictable.
The main issue is loss of control. When drift activates, your character walks forward, turns, or looks around on its own. You cannot stop this movement. Other players see your avatar behaving strangely, which breaks immersion and ruins conversations.
Precision becomes impossible with drift active. You want to point at something specific or navigate a crowded virtual room. Drift makes these actions frustrating because your joystick input does not match what you intended. Simple tasks take much longer to complete.
Drift also affects your social experience. VR Chat is about meeting people and having conversations. When your controller drifts, you appear uncontrolled or AFK (away from keyboard). Other players may think you are ignoring them or acting strange. This damages your reputation in the community.
Your gameplay performance drops significantly. Whether you are exploring environments or participating in activities, drift creates constant corrections. You spend more energy fighting your controller than actually playing.
The frustration builds quickly. You might close VR Chat and try again later, hoping the problem disappears. It rarely does without intervention. The longer you wait, the worse drift typically becomes.
Physical exhaustion happens too. You grip your controller tighter, trying to override the drift. Your hands and arms tire faster. This defeats the purpose of VR Chat, which should be relaxing and enjoyable.
The good news is that understanding how drift affects your experience motivates you to fix it. Once you address the problem, your VR Chat sessions return to normal. You regain full control and enjoy the social platform again.
Tools You Need Before You Start
Before you start fixing your Meta Quest Pro controller drift, gather the right tools. Having everything ready saves time and prevents frustration during the repair process.
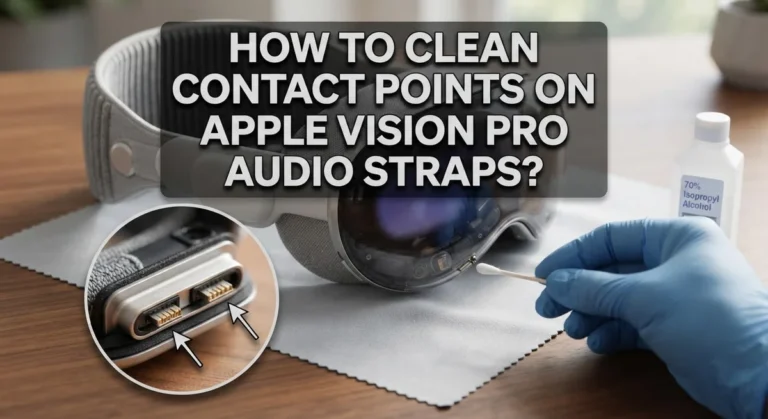
You will need a Phillips screwdriver or T6 Torx screwdriver to open your controller casing. Check which type your controller uses before starting. A plastic wedge or hard plastic tool helps you access the joystick mechanism safely. Avoid metal tools since they can damage delicate internal components.
Electrical contact cleaner is essential for this fix. This specialized spray removes dirt and debris from joystick contacts. If you cannot find electrical contact cleaner, isopropyl alcohol works as an alternative. WD40 electrical contact cleaner also works well. Never use water or standard household cleaners, as these damage electronics.
You should have a small cloth or paper towel nearby for cleanup. This helps you wipe away excess cleaner after application. A well lit workspace matters too. Good lighting helps you see small components clearly and avoid mistakes.
Consider having your Meta Quest Pro headset nearby during this process. You will need it to recalibrate your controller after cleaning. The recalibration step happens through your headset settings, so keep it charged and ready.
Optional but helpful items include a small container for screws. Keeping screws organized prevents losing them during disassembly. A camera or phone can document your disassembly steps. This reference helps you reassemble everything correctly.
Taking time to prepare your workspace and gather tools prevents common mistakes. You avoid interruptions mid repair and complete the job successfully. Start only when you have everything ready.
How To Recalibrate Your Meta Quest Pro Controllers Through Headset Settings
Start by putting on your Meta Quest Pro headset and navigating to the main menu. Look for the Settings option and select it. From there, find the Devices section, which contains all your controller settings.
Once you enter Devices, select Controllers from the menu. You will see options for both your left and right controllers. Choose the controller that has drift issues, or calibrate both if you experience problems with each one.
Look for the Calibrate option within the controller settings. This tool resets your joystick’s baseline position and helps the system recognize your actual inputs more accurately. Follow the on screen prompts carefully during calibration.
The system will ask you to move your joystick in specific directions. Move it slowly and deliberately to each position the headset requests. Complete full circles and press the stick in different directions as instructed. This process teaches your controller what “neutral” position means.
After calibration, test your controllers in a safe space before launching VR Chat. Move the joysticks around and watch for any unwanted character movement. If drift persists, you have successfully completed the software side of troubleshooting.
Some headsets also offer a deadzone adjustment setting. This feature increases the area around center position where inputs are ignored. A larger deadzone can reduce minor drift symptoms temporarily. However, this is a workaround rather than a permanent fix.
Write down which controller had issues and when the drift started. This information helps you decide if physical cleaning is your next step. Recalibration through headset settings alone fixes drift in about 30 percent of cases, so keep this data for reference.
How To Clean the Joystick Contacts With Contact Cleaner
Electrical contact cleaner removes dirt and oxidation from your joystick contacts. This buildup causes the drift problem you experience in VR Chat.
Start by opening your controller casing with your Phillips or T6 Torx screwdriver. Remove the screws carefully and place them in a small container so you don’t lose them. Gently separate the casing halves without forcing them apart.
Locate the joystick mechanism inside your controller. You will see a small component with metal contacts. Use a plastic wedge or hard plastic tool to carefully access the joystick without damaging surrounding parts.
Spray the contact cleaner directly onto the joystick contacts. Let the liquid sit for a few seconds to break down oxidation and debris. The cleaner evaporates quickly, so work efficiently during this step.
Use a clean, dry cloth to gently wipe away excess cleaner from the joystick area. Be thorough but gentle to avoid pushing dirt deeper into the mechanism. Allow the contacts to air dry completely before reassembling.
Some people use isopropyl alcohol as an alternative if contact cleaner is unavailable. Apply it the same way and let it dry fully. Never use water or oil based cleaners on electronic components.
Reassemble your controller by reversing the opening steps. Align the casing halves carefully and tighten all screws securely. Don’t over tighten, as this can crack the plastic housing.
Test your controller immediately after reassembly. Move the joystick through its full range in all directions. If drift still occurs, recalibrate your controller through your headset settings before testing again in VR Chat.
How To Physically Disassemble and Deep Clean the Controller
Start by powering off your controller completely before you begin any disassembly work. This prevents accidental button presses and protects your device’s electronics.
Locate the seams on your controller casing where the two halves connect. Use your Phillips or T6 Torx screwdriver to remove all visible screws from the back panel. Keep these screws in a small container so you don’t lose them during the process.
Gently pry open the casing using a plastic wedge or hard plastic tool. Avoid using metal objects, as these can scratch or damage the internal components. Work slowly around the edges until the two halves separate completely.
Once open, you’ll see the joystick mechanism mounted on the circuit board. This is where dust and debris accumulate over time. Examine the area around the joystick base for visible dirt or discoloration.
Apply electrical contact cleaner directly to the joystick contacts and the surrounding mechanism. Let the cleaner sit for several seconds to dissolve oxidation and break down stubborn residue. Use a clean, dry cloth to gently wipe away the excess liquid.
Pay special attention to the sides of the joystick where it connects to the circuit board. This area collects the most debris. If you notice heavy buildup, apply cleaner again and repeat the wiping process.
Allow everything to dry completely before reassembling. This typically takes five to ten minutes. Reverse your disassembly steps carefully to put the controller back together, ensuring all screws are tight but not over tightened.
Common Mistakes To Avoid When Fixing Controller Drift
When fixing controller drift, people often make errors that make the problem worse instead of better. Understanding these mistakes helps you avoid costly damage to your controllers.
Using the wrong cleaning products is one of the biggest errors. Never use water, vinegar, or general purpose cleaners on your joystick mechanism. These liquids can damage the circuit board and cause permanent failure. Stick only to electrical contact cleaners or isopropyl alcohol specifically designed for electronics.
Applying too much liquid causes another common problem. People spray cleaner directly and heavily onto the joystick contacts. Excess liquid seeps into the circuit board and creates new electrical issues. Use a light spray or apply cleaner to a cloth first, then gently dab the joystick area.
Forcing the controller open damages the plastic casing. Don’t use metal tools or apply excessive pressure when prying open your controller. Metal tools scratch and puncture the circuit board. Always use plastic wedges or hard plastic tools designed for electronics disassembly.
Skipping the recalibration step leaves you with unresolved drift. Many people clean their joystick contacts but forget to recalibrate through the headset settings. Recalibration teaches your system the new joystick range after cleaning.
Reassembling incorrectly creates connection problems. Pay attention to cable placement and screw positions when putting your controller back together. Loose screws or pinched cables cause new drift issues.
Testing immediately in VR Chat without proper verification is risky. Always test your controllers in a safe space first. This confirms the fix actually worked before you jump into your game. Taking time for these simple checks prevents frustration and controller damage.
How To Prevent Controller Drift From Coming Back
Controller drift often returns if you don’t take steps to prevent it. The good news is that prevention is simpler than you might think.
Keep your joysticks clean regularly. Dust and debris accumulate over time and cause drift to return. Wipe your joysticks gently with a dry cloth once a week. This stops particles from building up inside the mechanism.
Avoid putting excessive pressure on your joysticks. Many VR Chat users press down hard during intense gameplay. This wears out the internal contacts faster. Use gentle, controlled movements instead. Your controllers will last much longer.
Store your controllers properly when you’re not using them. Keep them in a cool, dry place away from humidity and extreme temperatures. Moisture damages the internal circuitry and speeds up drift problems. A storage case or drawer works well.
Adjust your deadzone settings in your headset regularly. Go to Settings, then Devices, then Controllers. Increase the deadzone slightly to give your joysticks more tolerance. This prevents minor drift from affecting your VR Chat experience.
Don’t leave your controllers exposed to dust. Cover them when they’re sitting on a table or shelf. Even a simple cloth works fine for this.
Check your controller firmware updates periodically. Meta releases updates that sometimes improve stick calibration. Installing these updates can prevent drift from developing.
Finally, calibrate your controllers monthly. This resets the joystick baseline and catches early drift problems before they get worse. You can do this quickly through your headset settings.
These prevention habits take minimal effort but save you from dealing with drift repeatedly. Consistency is key to keeping your controllers working smoothly in VR Chat.
Final Thoughts
Controller drift in VR Chat is frustrating, but it is also fixable. You now have a clear path from diagnosis to solution, whether you choose software adjustments or a full physical cleaning.
Start with the simplest fix first. Adjusting your deadzone settings costs nothing and takes only a few minutes. If that does not work, move on to the contact cleaner method before attempting full disassembly.
The key is patience throughout the entire process. Rushing any step, especially the disassembly or reassembly, can turn a minor drift issue into a broken controller.
Always recalibrate after any cleaning or adjustment. Skipping this step is one of the most common reasons people think their fix did not work when it actually did.
Prevention is just as important as the fix itself. Regular light cleaning and proper storage go a long way toward keeping drift from coming back after you have already put in the work to fix it.
VR Chat specifically puts heavy demand on your joysticks because of constant movement, social interaction, and long play sessions. This makes your Meta Quest Pro controllers more vulnerable to drift than controllers used for lighter gaming.
Take your controller health seriously as part of your VR setup routine. A few minutes of maintenance every couple of weeks saves you hours of troubleshooting later.
If drift keeps returning even after deep cleaning and recalibration, the joystick mechanism itself may be worn beyond repair. At that point, contacting Meta support about a replacement is your best next step.
You can get back to VR Chat smoothly with the right approach and a little consistency.
Frequently Asked Questions
What exactly is controller drift and why does it happen?
Controller drift occurs when your joystick registers movement even though you’re not touching it. This happens because the internal contacts inside the joystick wear down over time. Dust and debris get into the mechanism, which interrupts the electrical signal. VR Chat users experience this more often because the game demands constant joystick input during gameplay and avatar movement.
The problem gets worse with regular use. Your joystick has tiny metal contacts that slide across a resistive surface. After months of gameplay, these contacts become dirty or damaged. When they can’t read your input correctly, the headset thinks you’re moving when you’re standing still.
Can I fix drift without opening my controller?
Yes, you can try software fixes first. Open your headset Settings and go to Devices, then Controllers. Look for thumbstick range and deadzone adjustment options. Increasing your deadzone tells the controller to ignore small movements.
You can also recalibrate your controller through the same menu. This process resets how your headset interprets joystick input. Many users solve their drift problem this way without any disassembly needed.
If software fixes don’t work, then physical cleaning becomes necessary.
What cleaning products should I use?
Use electrical contact cleaner specifically designed for electronics. Isopropyl alcohol also works well for this purpose. These products evaporate quickly and won’t damage internal components.
Never use regular water or household cleaners. Avoid oil based products that leave residue. Don’t spray liquid directly into the joystick. Instead, apply cleaner to a small tool or cotton swab, then gently access the internal contacts.
How long does the fix usually last?
A proper cleaning typically lasts several months to a year. Results depend on how heavily you use your controllers. Regular maintenance cleaning every few months keeps drift from returning quickly.
Proper storage and avoiding excessive joystick pressure extends the fix’s lifespan significantly.

Hi, I’m Suzy — the voice behind RapidGenLab. I’m a tech enthusiast who loves breaking down complex products into simple, honest reviews and comparisons. Got a question? Feel free to reach out!