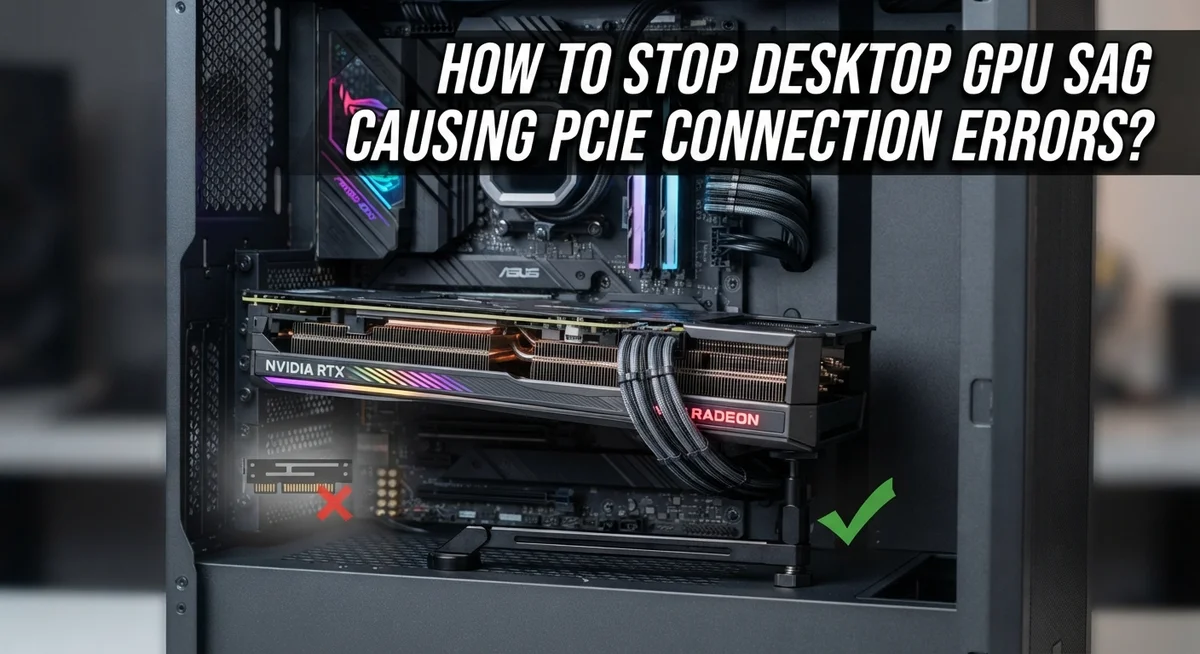
How To Stop Desktop GPU Sag Causing PCIe Connection Errors?
Your graphics card is heavy. Over time, gravity pulls it down inside your case. This is called GPU sag, and it happens more often than most people think.
Sag looks harmless at first. But it can loosen the PCIe connection between your GPU and motherboard. That loose connection often leads to display glitches, random crashes, or total detection failures.
The good news is that GPU sag is easy to fix. You do not need advanced tools or technical skills.
This guide walks you through why sag happens and how it affects your PCIe connection. You will learn simple, safe methods to support your GPU properly.
In a Nutshell
- GPU sag can cause real damage. It puts stress on your PCIe slot and may lead to connection errors over time.
- A support bracket is the safest fix. It holds your card level and stops it from pulling on the motherboard.
- Case positioning matters too. Keeping your motherboard and GPU in a vertical alignment reduces strain naturally.
- Check your PCIe slot connection. Make sure the card sits firmly in the bracket to avoid loose contacts.
- Never over tighten your GPU. This is a common mistake that can crack the card or damage the slot.
- Don’t ignore the droop. Small sag today can turn into lasting hardware problems later.
What Is GPU Sag and Why Does It Happen?
A graphics card is one of the heaviest components inside your computer case. When you install it into the PCIe slot, gravity pulls down on it constantly. Over time, this weight causes the card to droop or sag toward the bottom of the case.
GPU sag happens because the PCIe slot alone cannot support the full weight of modern graphics cards. High end cards can weigh several pounds. The slot was designed to hold the card in place electrically, not to bear its physical weight. As the card droops, it creates uneven pressure on the PCIe connector.
This uneven pressure is the real problem. The connector pins inside the slot start to lose contact with the card’s edge connector. When contact becomes loose, your system experiences intermittent connection errors. Your computer may freeze, crash, or fail to recognize the GPU entirely.
The drooping also bends the PCIe slot itself over months or years. Once the slot bends, it becomes harder to reseat the card properly. Even a new graphics card may not fit correctly into a damaged slot.
GPU sag also creates electrical stress on the slot connector. The uneven weight distribution means some pins carry more current than others. This uneven load can cause those pins to overheat or fail prematurely.
You might notice sag by looking at your graphics card from the side of the case. If the card tilts downward away from the motherboard, sag is occurring. Some cards sag more than others depending on their design and weight distribution.
The key point is that GPU sag is not just a cosmetic issue. It directly affects your PCIe connection reliability. Addressing sag early prevents expensive hardware damage and system instability later. Even a small visible droop deserves attention before connection errors start happening.
Warning Signs: How to Tell Sag Is Causing PCIe Errors
GPU sag causes specific warning signs that tell you a PCIe connection problem is developing. You need to recognize these signs early before damage happens.
Visible drooping is the first clue. Look at your graphics card from the side of your case. Does the card tilt downward at the far end? Even a slight angle means weight is pulling on the PCIe slot. This drooping gets worse over time if you ignore it.
Connection errors appear in your system. Your computer might crash during gaming or heavy graphics tasks. You could see driver crashes or the card temporarily disconnecting and reconnecting. These errors happen because the drooping card loses solid contact with the PCIe slot pins.
Performance drops without explanation. Your frame rates fall or your graphics card throttles itself down. This occurs because the loose connection causes electrical instability. The card cannot communicate properly with your motherboard.
Unusual heat problems develop. A sagging card may not sit properly in its slot, disrupting power delivery. This causes the GPU to work harder and generate excess heat. Your temperatures spike even during normal use.
Physical inspection reveals the problem. Power your system down completely. Look inside your case at the PCIe bracket where the card connects. Check if the card sits unevenly in the slot. One corner might sit higher than the other.
Listen for clicking or popping sounds. These noises indicate the card is moving slightly inside the slot. Movement creates intermittent connection breaks.
Check your system logs for errors. Look at device manager or system logs for repeated GPU connection failures. These logs confirm that your hardware is losing connection.
The key is acting fast. Once you notice any of these signs, address the sag immediately. Waiting allows the problem to worsen and potentially cause permanent slot damage.
Step-by-Step: Securing Your PCIe Slot Connection
Start by powering down your computer completely. Unplug the power cable and wait 30 seconds. This prevents electrical damage while you work.
Open your case and locate the PCIe slot where your graphics card sits. Look at the small retention clip on the right side of the slot. This clip holds your card in place and needs proper attention.
Gently press down on your graphics card to seat it fully into the slot. You should hear or feel a click when the card locks in. The card should sit flush against the bracket without gaps.
Now focus on the retention clip. Push it firmly until it clicks into the locked position. The clip should hold your card snugly without excessive force. Proper tension here is critical because it keeps electrical contacts engaged.
Check the metal bracket on your case. Verify that your graphics card’s bracket screws are tight but not over-tightened. Use a screwdriver to secure these screws with firm, steady pressure. Stop when you feel resistance.
Inspect the entire connection from multiple angles. Your card should sit level and straight. If it still droops, you may need additional support measures like a support bracket mounted underneath.
Power your system back on and run a test. Monitor your graphics card during normal use. Watch for any connection errors or crashes that indicate loose contacts.
If problems persist after securing the PCIe connection, the slot itself may have damage. In this case, consider professional repair or motherboard replacement.
Remember: the goal is secure contact, not crushing force. A properly seated card will feel stable without wiggling. Regular checks every few months help catch loose connections before they cause serious errors.
Step-by-Step: Installing a GPU Support Bracket
Installing a GPU support bracket is one of the most practical ways to fix GPU sag. This process takes only a few minutes and requires basic tools. Follow these steps carefully to get your graphics card properly supported.
First, power down your computer completely. Unplug the power cable from the wall outlet. Wait at least 30 seconds before opening your case. This safety step protects both you and your hardware from electrical damage.
Next, open your computer case according to your case’s design. Locate your graphics card and the area beneath it where the bracket will attach. Most support brackets mount to the case frame or the bottom edge of the graphics card itself.
Position the bracket so it contacts the graphics card firmly without applying excessive pressure. The bracket should rest against the card’s bottom or side edge. Ensure the bracket’s base sits securely on the case frame or another stable surface inside your case.
Attach the bracket using the provided hardware. Most brackets use screws or adhesive strips. If using screws, hand tighten them first. Make sure the bracket is straight and level before final tightening.
Check that the bracket holds your graphics card at the correct height. The card should sit level with the PCIe slot. There should be no visible drooping or tilting toward one side.
Close your case and reconnect the power cable. Power on your system and check that everything boots normally. Run a stress test or play a demanding game to verify stable performance.
The key point is that support brackets work best when installed correctly. A properly installed bracket prevents future sag and protects your PCIe connection. If your card still shows signs of sag after installation, check that the bracket is tight and positioned correctly. Reinstall if needed to achieve proper support and alignment.
Repositioning Your Case and Motherboard for Vertical Alignment
Your case orientation and motherboard positioning play a crucial role in preventing GPU sag and connection errors. When your graphics card sits at an angle, gravity works against the PCIe slot connection, creating stress and potential failures.
Start by examining how your case currently sits. Most desktop cases can be positioned either vertically or horizontally. Vertical orientation is your best choice because it allows your GPU to hang straight down into the PCIe slot rather than at an angle. This alignment reduces strain on both the card and the slot itself.
Check your motherboard’s position inside the case. The PCIe slot should be perpendicular to the ground when your case sits in normal position. If your motherboard is tilted or angled, your GPU will naturally sag toward one side. Adjust any mounting brackets or standoffs to ensure your motherboard sits flat and level.
Consider your case’s airflow design too. Some cases have better support structures than others. If your current case doesn’t provide adequate motherboard support, you may need to reposition internal components or add additional mounting points. Make sure nothing blocks the GPU’s path into the slot.
Once you’ve positioned your case and motherboard correctly, your GPU should sit more evenly in the PCIe slot. This proper alignment reduces the pressure on individual connection points and helps maintain electrical contact throughout normal operation.
Test your setup before closing the case completely. Power on your system and run some basic tests to ensure stable performance. Check for any unusual noises or error messages. If your GPU still shows signs of misalignment, you may need to add a support bracket to provide additional structural help.
Proper case and motherboard positioning is often the first step in solving GPU sag issues. Many connection errors disappear simply by ensuring everything sits at the correct angle.
Common Mistakes That Make GPU Sag Worse
Many people make mistakes that actually make GPU sag worse instead of better. Understanding these errors helps you avoid them and protect your graphics card.
Over tightening is one of the biggest mistakes. People think that cranking down on the PCIe bracket as hard as possible will solve the problem. This approach can crack your graphics card, damage the PCIe slot, or break the retention clip. You only need to tighten the bracket until the card feels secure and stops moving. It should not require extreme force.
Another common error is ignoring early warning signs of sag. You might notice your card droops slightly or sits at an odd angle. Many people leave this alone, thinking it will resolve itself. The problem only gets worse over time. A small droop today becomes a major connection issue tomorrow.
Improper bracket installation causes serious problems too. People sometimes install support brackets without checking if they make proper contact with the graphics card. A bracket that does not touch the card provides zero support. Others install brackets at the wrong angle, which can actually push the card out of alignment rather than holding it in place.
Placing heavy objects on top of your case is another mistake to avoid. This extra weight pushes down on the entire system and increases sag pressure. Your case should sit on a flat surface with nothing resting on top of it.
Finally, people often skip checking their PCIe slot connection entirely. They assume the card is seated properly when it actually sits loose in the slot. Before installing any support bracket or making other changes, always verify that your graphics card sits fully in the PCIe slot with the retention clip properly secured.
These mistakes compound each other. Avoiding them keeps your GPU healthy and your connection stable.
Troubleshooting Persistent PCIe Connection Errors
When your GPU shows connection errors, the first step is identifying whether sag is truly the culprit. Start by powering down your system completely and opening your case. Look at your graphics card from the side. Does it droop noticeably downward at the far end? A healthy card sits level with the PCIe slot.
Next, check your PCIe bracket connection. This is the metal clip on your motherboard that holds the GPU in place. Gently push your graphics card upward into the slot. You should hear or feel a slight click. The bracket should snap firmly into the retention notch on your card’s edge.
Inspect the actual PCIe slot for debris or damage. Dust buildup can prevent proper seating. Use compressed air to clean around the slot area carefully. Never insert anything metal into the slot itself.
After cleaning, reseat your GPU completely. Remove it fully from the slot, then reinsert it slowly until the bracket clicks. This often resolves intermittent connection errors caused by loose seating.
Check your power connectors next. GPU sag sometimes causes strain on PCIe power cables. Ensure all 6 pin or 8 pin connectors are fully inserted and seated properly. A loose power connection mimics PCIe slot errors.
Test your system with basic software tools that monitor GPU detection and stability. Run these tests for several minutes to confirm the connection holds steady.
If errors persist after reseating and cleaning, the PCIe slot itself may have internal damage. In this case, you may need professional evaluation. However, most persistent connection errors resolve through proper reseating and ensuring your support bracket (if installed) isn’t preventing full slot contact. The key is checking each connection point systematically rather than assuming one cause.
Final Thoughts
GPU sag is a common problem, but it does not have to damage your system. Simple fixes like support brackets and proper case alignment can solve most sag issues quickly.
Your graphics card works hard every day. Giving it proper support helps it perform well for years to come.
Remember that prevention beats repair. Catching sag early saves you from PCIe connection errors and potential hardware failure.
Do not wait until your screen glitches or your system fails to detect the GPU. Check your card’s position regularly, especially after moving your computer.
A few minutes of maintenance can prevent hours of troubleshooting later. Look at your GPU from the side every month or so.
If you notice even slight drooping, address it right away. Small sag problems grow worse over time if left alone.
Use a support bracket if your card feels heavy or shows any dip. These brackets are simple to install and provide real structural help.
Keep your PCIe slot connection secure but do not overdo it. Tighten only what needs tightening, and avoid forcing anything.
If you are unsure about adjusting your GPU directly, get help from someone experienced. This protects your hardware from accidental damage.
Your case orientation matters too. A well positioned case reduces stress on your graphics card naturally.
Think of GPU care as an ongoing habit, not a one time fix. Regular checks keep your system running smoothly.
Most sag related problems have straightforward solutions. You do not need expensive tools or technical expertise to fix them.
With the right support and a bit of attention, your GPU will stay properly seated. This means fewer errors and better performance overall.
Take these steps seriously, and your graphics card will thank you. A stable, well supported GPU means a stable, reliable computer for everyday use.
Frequently Asked Questions
Can GPU sag actually damage my PCIe connection?
Yes, it can. When your graphics card droops under its own weight, the connection inside the PCIe slot weakens. This loose fit creates intermittent contact problems. Your system may fail to detect the GPU or show connection errors during use. The longer you ignore sag, the more likely permanent damage becomes to both the slot and the card’s connector pins.
How do I know if my GPU is sagging?
Look at your graphics card from the side of your case. A sagging card tilts downward at the back end. You might see a visible gap between the card and the slot bracket. Some cards droop so much they rest against other components inside the case. If your card feels heavy when you gently touch it, that’s another sign sag is happening.
What’s the safest way to tighten my PCIe connection?
Only tighten the PCIe bracket screw that holds the card to your case. Turn it firmly but stop when you feel resistance. Do not force it beyond that point. Never try to tighten the GPU itself unless you have experience. Overtightening damages the delicate connectors and can crack the circuit board. When in doubt, ask someone with hardware experience to help you.
Will a support bracket really fix PCIe errors?
Support brackets work well for most sag situations. They hold the back of the card level with the PCIe slot. This restores proper connection pressure inside the slot. Many users see connection errors disappear after installing a bracket correctly. However, if your PCIe slot already has internal damage, a bracket alone won’t fix that problem.
Should I clean my PCIe slot before reseating my GPU?
Yes, absolutely. Dust buildup inside the slot prevents your card from sitting fully inside. Use compressed air to blow out debris carefully. Let any moisture settle before powering on. After cleaning, reseat your GPU by removing it completely and pushing it back in firmly. This simple step solves many connection errors without any other fixes needed.

Hi, I’m Suzy — the voice behind RapidGenLab. I’m a tech enthusiast who loves breaking down complex products into simple, honest reviews and comparisons. Got a question? Feel free to reach out!