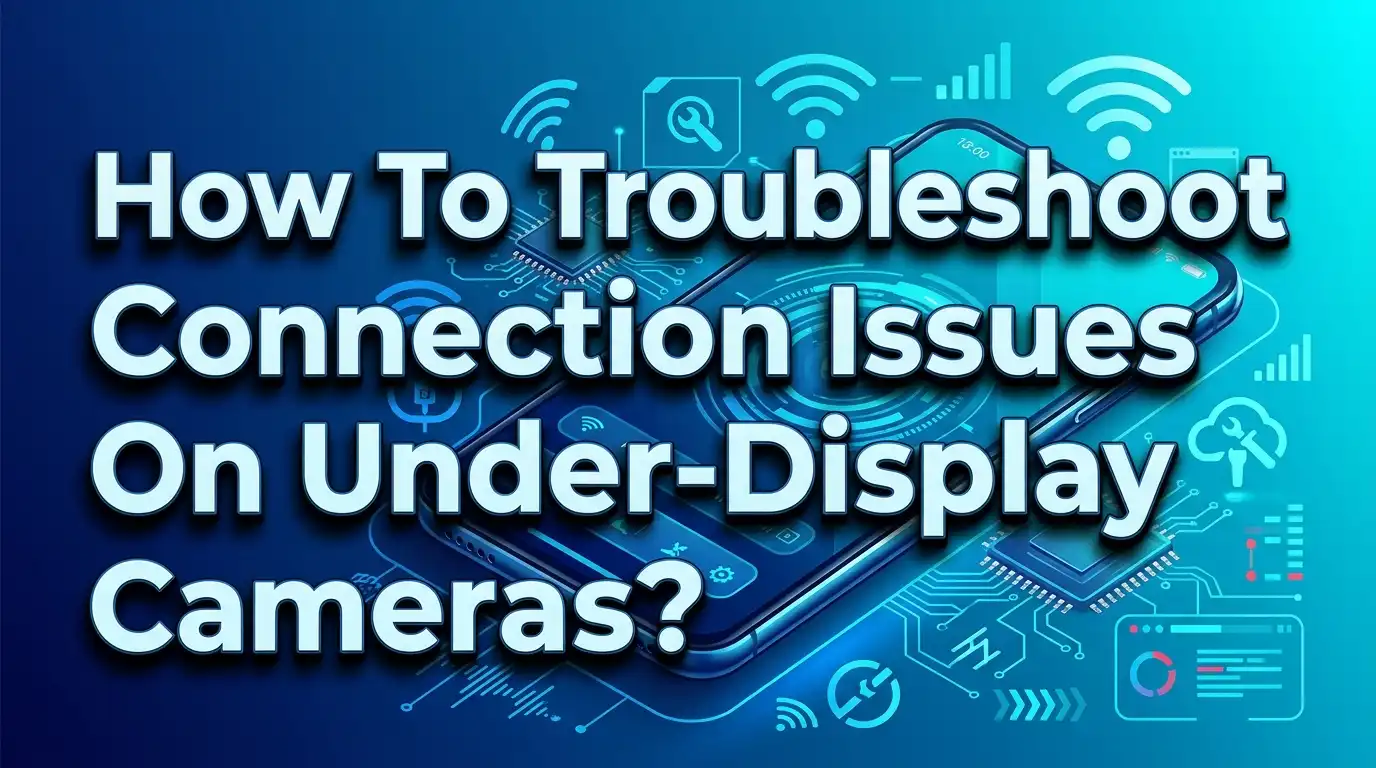
How To Troubleshoot Connection Issues On Under Display Cameras?
Have you ever tried to snap a selfie or join a video call, only to find your under display camera refusing to cooperate? You are not alone. Under display cameras (UDCs) are one of the most exciting features in modern smartphones.
The camera might show a black screen. It might produce blurry, washed out photos. Sometimes the camera app crashes entirely. Other times, the pixels above the camera become visible and distracting.
These issues stem from a mix of software glitches, permission errors, hardware quirks, and the physical limitations of shooting through a display panel. The good news? Most of these problems have clear, practical fixes you can try right now.
This guide walks you through every common connection and performance issue tied to under display cameras. You will learn what causes each problem, how to identify it, and exactly what steps to take to solve it.
Key Takeaways
- Under display cameras face unique challenges because they capture images through the screen itself. The pixel grid, thin film layers, and display materials can cause diffraction artifacts, color shifts, and blurry photos. Understanding this helps you set realistic expectations and apply the right fixes.
- Most UDC connection failures are software related. A simple restart, a cache clear, or a software update can resolve the majority of camera errors, black screens, and app crashes. Always start with these quick fixes before moving to advanced steps.
- Camera app permissions are a hidden culprit. After a system update, your camera app may lose access to storage, microphone, or location permissions. Checking and restoring these permissions takes seconds and often solves the problem immediately.
- Third party apps can block your camera. Social media, video calling, and other apps that use the camera can create conflicts. Closing background apps or booting into Safe Mode helps you identify and remove the offending app.
- Display pixel visibility over the camera is a known issue. If the area above your UDC looks different or shows visible pixels, cleaning the screen, adjusting display settings, or using dark mode can reduce the appearance. This is a hardware characteristic, not a defect.
- Factory reset is a last resort, not a first step. Only reset your phone after you have tried every other solution. Always back up your data before performing a factory reset to avoid permanent data loss.
What Is An Under Display Camera And Why Does It Have Connection Problems
An under display camera is a front facing camera placed behind the smartphone screen. The camera shoots through the display panel itself. This design removes the need for a notch, hole punch, or cutout in the screen. You get a full, uninterrupted display for watching videos, playing games, and browsing.
However, this setup creates inherent physical challenges. The camera must capture light through layers of OLED pixels, thin film coatings, and glass. The pixel grid above the camera has periodic gaps that allow light to pass through.
These gaps also cause diffraction artifacts, which scatter light and reduce image sharpness. The thin film layers inside the OLED panel can alter the color spectrum of incoming light, leading to color shifts in your photos.
Manufacturers reduce pixel density in the area above the camera to let more light reach the sensor. This tradeoff means the display looks slightly different in that small region. Software processing then works overtime to correct the image. All of these factors can result in connection errors, camera app failures, black screens, and poor image quality. The camera hardware is functional, but the software bridge between the display and the camera sensor is where problems often appear.
Devices like the Samsung Galaxy Z Fold series, RedMagic gaming phones, and ZTE Axon series all use under display cameras. Each brand handles the technology differently, but the core challenges remain the same. Knowing this foundation helps you troubleshoot with confidence.
Restart Your Phone To Clear Temporary Glitches
The simplest and most effective first step is restarting your phone. A restart clears temporary memory, closes stuck processes, and resets the software connections between your camera sensor and the display. Many camera failures are caused by minor software bugs that build up during normal use.
Press and hold the power button on your device for several seconds. A menu will appear on your screen. Select Restart and wait for the phone to power back on. Once it restarts, open the camera app and test it. In many cases, this single step resolves the problem completely.
If a standard restart does not work, try a forced restart. On most Samsung devices, hold the volume down button and the power button at the same time for about 10 to 15 seconds. The phone will shut down and restart. This forces all background processes to stop and gives the system a clean start.
A restart is especially helpful after installing new apps or system updates. These changes can temporarily disrupt the way your camera app communicates with the hardware. A fresh boot re establishes those connections. Make this your go to first step before trying anything else. It takes less than a minute and solves camera issues more often than you might expect.
Check And Restore Camera App Permissions
Your camera app needs specific permissions to function correctly. These permissions include access to the camera sensor, microphone, storage, and sometimes location data. If any of these permissions are missing or disabled, the camera may fail to open, crash, or show a black screen.
System updates and app updates can sometimes reset these permissions without warning. This is one of the most overlooked causes of UDC connection failures. Fortunately, the fix is quick and straightforward.
On Android, press and hold the Camera app icon on your home screen. Tap the small “i” button or select App Info from the popup menu. Go to Permissions and review the list. Make sure Camera, Microphone, and Storage permissions are all set to “Allow” or “Allow only while using the app.”
If any permission shows as “Denied” or “Ask every time,” change it to the appropriate allow setting. Close the settings and reopen the camera app. Test it by taking a photo and recording a short video.
On some devices, you can also check permissions through Settings > Privacy > Permission Manager > Camera. This view shows you every app that has or lacks camera access. Look for your default camera app and confirm it has full access. Restoring permissions takes just a few taps, but it resolves a surprising number of camera connection errors.
Clear The Camera App Cache And Data
Over time, the camera app stores temporary files called cache data. This cache helps the app load faster, but it can also become corrupted or outdated. Corrupted cache is a common reason for camera freezes, crashes, and slow performance on phones with under display cameras.
Clearing the cache does not delete your photos or videos. It only removes temporary files that the app uses internally. Here is how to do it on most Android devices.
Open Settings on your phone. Go to Apps or Application Manager. Scroll down and find the Camera app. Tap on it, then select Storage. You will see two options: Clear Cache and Clear Data. Start by tapping Clear Cache first. This removes the temporary files without changing your camera settings.
If the problem persists after clearing the cache, return to the same menu and tap Clear Data. This resets the camera app to its factory default settings. Your photo grid preferences, timer settings, and filter selections will return to their original state. Your saved photos and videos remain safe in your gallery.
After clearing the cache and data, open the camera app and test it. The first launch may take a few extra seconds because the app is rebuilding its cache from scratch. This process often fixes issues that a simple restart could not resolve. It is a safe and effective troubleshooting step that every UDC user should know.
Update Your Phone Software And Camera App
Running outdated software is a frequent cause of camera connection problems. Manufacturers release software updates that include bug fixes, performance improvements, and camera optimizations. Missing these updates can leave your camera app struggling with known issues that have already been patched.
Check for system updates by going to Settings > Software Update > Download and Install. If an update is available, connect to Wi Fi and let it download. Follow the on screen instructions to install it. Your phone will restart during the process.
You should also update the camera app itself. On Samsung devices, open the camera app, go to Settings (the gear icon), scroll to About Camera, and check for updates. On other Android devices, open the Google Play Store, search for your camera app, and tap Update if one is available.
Software updates are especially important for under display cameras because these cameras rely heavily on software processing. The algorithms that correct diffraction artifacts, color shifts, and blurriness improve with each update. A camera that produces washed out or blurry selfies today might perform noticeably better after a software update.
Make it a habit to check for updates at least once a month. Enable automatic updates if your phone supports this feature. Keeping your software current is one of the simplest ways to maintain a healthy, working under display camera.
Close Background Apps That Use The Camera
Multiple apps competing for camera access at the same time can cause conflicts and connection failures. Social media apps like Instagram, Snapchat, and TikTok all use the camera. Video calling apps like Zoom, Google Meet, and WhatsApp also access the camera sensor. If one of these apps holds onto the camera in the background, your default camera app may fail to connect.
Close all background apps before opening your camera. If your phone uses gesture navigation, swipe up from the bottom of the screen and hold until the recent apps view appears. Swipe away each app individually, or tap “Close All” to shut everything down at once.
If your phone uses button navigation, tap the recent apps button (usually a square icon) and swipe apps away. Pay special attention to any app that might be using the camera or microphone in the background.
After closing all apps, open the camera app fresh. If the problem disappears, one of those background apps was the cause. You can identify the specific app by opening them one at a time and checking if the camera conflict returns. Once you find the culprit, consider updating that app, reinstalling it, or adjusting its permissions to prevent it from accessing the camera in the background. This fix resolves a significant number of UDC camera failures.
Boot Into Safe Mode To Identify App Conflicts
If closing background apps did not solve the problem, Safe Mode can help you dig deeper. Safe Mode disables all third party apps on your phone. Only the pre installed system apps will run. This makes it easy to determine whether a downloaded app is causing the camera issue.
To enter Safe Mode on most Samsung devices, press and hold the power button until the power menu appears. Then press and hold the Power Off option on screen until you see a prompt to reboot into Safe Mode. Tap the confirmation button and wait for your phone to restart.
Once your phone boots into Safe Mode, you will see a “Safe Mode” label in the bottom corner of the screen. Open the camera app and test it. If the camera works perfectly in Safe Mode, a third party app is causing the conflict. Think about any apps you recently installed or updated. Uninstall them one by one and test the camera after each removal.
If the camera still fails in Safe Mode, the issue is more likely related to the system software or the hardware itself. In that case, move on to the next troubleshooting steps in this guide.
To exit Safe Mode, simply restart your phone normally. It will boot back into the regular operating mode with all your apps restored. Safe Mode is a powerful diagnostic tool that helps you narrow down the source of the problem without making any permanent changes to your phone.
Fix Visible Pixels And Display Artifacts Over The Camera
One of the most common complaints about under display cameras is the visible pixel area directly above the camera sensor. This small region of the screen often looks slightly different from the rest of the display. You might notice a faint circular or rectangular patch, especially on bright or white backgrounds.
This happens because manufacturers reduce the pixel density in that zone to allow more light to reach the camera. The area uses translucent wiring and fewer screen elements. This is a deliberate design choice, not a defect. However, it can become more noticeable over time, especially if dust or smudges collect on the screen surface above the camera.
Start by cleaning your screen with a soft, dry microfiber cloth. Avoid using water or cleaning sprays directly on the screen. Gently wipe the area above the camera to remove any debris that might be making the pixels more visible.
Switching to dark mode can also help. Dark backgrounds make the pixel variation much less noticeable. On Samsung devices, you can also use the MultiStar module in Good Lock to adjust UDC visibility settings. Open MultiStar, go to “I Love Galaxy Foldable,” and toggle the “UDC with black” setting.
Keep in mind that some degree of pixel visibility is normal for current under display camera technology. If the area suddenly looks damaged, discolored, or shows dead pixels that were not there before, contact your device manufacturer for support. Otherwise, the tips above will minimize the visual impact.
Reset Camera Settings To Default
Sometimes the camera itself works fine, but incorrect settings cause poor performance or strange behavior. You may have accidentally changed a resolution setting, turned on a filter, or adjusted the exposure in a way that causes the camera to malfunction.
Resetting the camera settings returns everything to factory defaults without affecting your photos or the rest of your phone. Open the Camera app and tap the Settings icon, which usually looks like a gear. Scroll down to find the option labeled Reset Settings or Restore Defaults. Tap it and confirm the reset.
This action clears all custom configurations. Your shooting mode, resolution, timer, grid lines, and other preferences will return to their original values. After the reset, test the camera by taking a few photos and recording a video. Check if the image quality has improved and if the camera responds smoothly.
This step is particularly useful if your UDC photos look unusually blurry, discolored, or overexposed. Under display cameras depend on specific software calibration to produce acceptable images. If those settings get disrupted, the camera output suffers. A reset brings the calibration back to the manufacturer’s intended baseline.
If you previously customized your camera settings, make a note of your preferred options before resetting. You can reapply them after testing to see if any particular setting was causing the issue.
Free Up Storage Space On Your Device
Low storage space can cause your camera app to crash, freeze, or fail to save photos. The camera needs available memory to process images, store temporary files, and save your final photos and videos. If your phone is almost full, the camera may stop working altogether.
Check your available storage by going to Settings > Storage (or Settings > Device Care > Storage on Samsung devices). Review how much space is available. If you have less than 2 to 3 GB free, your phone is running dangerously low.
Start freeing up space by deleting old photos and videos you no longer need. Back up important files to cloud storage services like Google Photos or Samsung Cloud before removing them from your device. Uninstall apps you no longer use by opening the Google Play Store, tapping your profile icon, selecting Manage Apps & Devices, and removing unnecessary apps.
Clear cached data from other apps as well. Go to Settings > Storage > Cached Data and clear it. This removes temporary files from all apps at once and can recover a significant amount of space.
After freeing up storage, restart your phone and open the camera app. It should launch smoothly and save photos without errors. Maintaining at least 5 GB of free space is a good practice that keeps your camera and other apps running well. Set a monthly reminder to review and clean up your phone storage.
Perform A Factory Reset As A Last Resort
If you have tried every step above and your under display camera still does not work, a factory reset may be your final option. This process erases all data on your phone and restores it to the original out of box state. It removes all apps, settings, accounts, and files from the device.
Before performing a factory reset, back up everything. Transfer your photos, videos, and documents to cloud storage or a computer. Save your contacts by syncing them with your Google account. Note down any app specific settings you want to restore later.
To perform a factory reset on most Android devices, go to Settings > General Management > Reset > Factory Data Reset. Review the information on screen and tap Reset. Enter your PIN or password to confirm. The phone will restart and begin the reset process. This may take several minutes.
After the reset, your phone will boot as if it were brand new. Follow the setup wizard to sign into your accounts and reinstall your apps. Open the camera app and test it. If the camera works after the factory reset, a software issue was the cause. If the camera still fails, the problem is likely hardware related, and you should contact your manufacturer or visit an authorized repair center.
A factory reset is a powerful fix, but it should only be used after all other troubleshooting steps have failed. The inconvenience of restoring your data is significant, so exhaust every other option first.
Understand The Physical Limitations Of Under Display Cameras
Even after successful troubleshooting, you should understand the inherent limitations of under display camera technology. These cameras will never produce the same image quality as a traditional front facing camera sitting in a notch or hole punch cutout. The physics of shooting through a display panel impose real constraints.
The OLED pixel grid above the camera causes diffraction, which scatters incoming light and reduces sharpness. The thin film layers inside the display alter the color spectrum of the light reaching the sensor. Manufacturers compensate with AI powered image processing, but the results still fall short of dedicated selfie cameras.
Images from under display cameras often appear slightly soft, with muted colors and reduced contrast. Skin tones may look washed out or flat. Low light performance suffers more than on conventional cameras because less light passes through the display layers.
Samsung recognized these limitations and removed the under display camera from the Galaxy Z Fold 7, replacing it with a traditional camera cutout. This decision highlights how challenging the technology remains. Other manufacturers like RedMagic continue to use UDCs in gaming phones where screen real estate matters more than selfie quality.
Knowing these limitations helps you set realistic expectations. Your UDC is best suited for video calls and casual selfies rather than high quality portrait photography. For important photos, use the rear camera with the cover screen as a viewfinder if your device supports this feature. Understanding what your camera can and cannot do saves you from unnecessary frustration and unproductive troubleshooting.
When To Seek Professional Repair
Some under display camera problems go beyond software fixes. If your camera shows a persistent black screen after a factory reset, produces images with hardware artifacts, or fails to activate at all, the issue may be physical damage to the camera sensor or the display panel above it.
Physical damage can result from drops, water exposure, pressure on the screen, or manufacturing defects. The area above the UDC is particularly sensitive because the display is thinner there to allow light through. Even a minor impact in that region can displace the camera sensor or crack the thin film layers.
If you suspect hardware damage, do not attempt to open your phone yourself. Modern smartphones use tightly integrated components, and amateur repairs can cause additional damage or void your warranty. Contact your device manufacturer’s support line or visit an authorized service center.
Check your warranty status before seeking repair. Many manufacturers cover camera defects under the standard warranty. If your device is out of warranty, get a cost estimate from the service center before approving the repair. Compare the repair cost against the price of a replacement device to make an informed decision.
Some carriers and insurance providers also cover camera repairs as part of device protection plans. Review your coverage before paying out of pocket. Professional repair is the right choice when software troubleshooting fails and the problem clearly originates from the hardware.
FAQs
Why does my under display camera show a black screen?
A black screen usually indicates a software conflict, missing permissions, or a camera app crash. Start by restarting your phone and checking that the camera app has all required permissions. Clear the camera app cache and data. If the black screen persists in Safe Mode and after a factory reset, the camera sensor may have a hardware issue that requires professional repair.
Can I improve the photo quality of my under display camera?
You can improve photo quality by keeping your software and camera app updated. Manufacturers release updates that enhance the AI image processing used by UDCs. Clean the screen above the camera regularly to remove smudges and fingerprints. Use good lighting conditions, as UDCs struggle more in low light due to reduced light transmission through the display.
Why do I see visible pixels over my under display camera?
The area above the under display camera has a lower pixel density to allow light to reach the sensor. This reduced density can make that section of the screen look slightly different, especially on bright backgrounds. Using dark mode, cleaning the screen, and adjusting display settings can reduce the visibility of this area.
Is it normal for under display camera selfies to look blurry or washed out?
Yes, some degree of softness and color distortion is normal with current UDC technology. The camera captures light through the display panel, which causes diffraction and color shifts. Software processing corrects this partially, but the results may still look less sharp than photos from a traditional front camera. Keeping your software updated ensures you benefit from the latest image processing improvements.
Should I factory reset my phone to fix under display camera issues?
A factory reset should be your last option after trying all other fixes. Start with a restart, check permissions, clear cache, update software, and boot into Safe Mode. Only perform a factory reset if none of these steps work. Always back up your data before resetting, as the process erases everything on your device.
Will under display camera technology improve in the future?
Manufacturers and researchers are actively working on better UDC solutions. Advances in OLED pixel design, transparent display materials, and AI image restoration algorithms continue to improve. Companies are exploring new thin film structures and frequency domain image processing to reduce diffraction and color distortion. Future generations of UDCs will likely deliver significantly better image quality than current models.
Hi, I’m Suzy — the voice behind RapidGenLab. I’m a tech enthusiast who loves breaking down complex products into simple, honest reviews and comparisons. Got a question? Feel free to reach out!